
There’s something magical about a perfectly executed New York cheesecake. That first bite—creamy, rich, yet somehow light—is an experience that transcends ordinary desserts. I’ve spent years perfecting my technique, and today I’m sharing everything I know about creating this iconic dessert in your own kitchen.
The Magic of New York Cheesecake
New York cheesecake isn’t just any cheesecake. It stands apart with its signature dense, cream cheese-forward texture and tall profile. Unlike its Italian or French cousins, there’s nothing delicate about this dessert—it’s bold, unapologetically rich, and commands attention on any dessert table.
I first fell in love with New York cheesecake during a trip to the Big Apple years ago. Standing in Junior’s Restaurant, watching tourists and locals alike savoring their slices with reverent silence, I knew this was a dessert with history—a true American classic deserving of respect and careful preparation.
The origins of New York cheesecake trace back to the early 1900s, evolving from lighter European versions into something distinctly American. The game-changer was the development of cream cheese in 1872 in Chester, New York (later becoming Philadelphia brand), providing the perfect base for this indulgent dessert.
What Makes a Cheesecake “New York Style”?
New York cheesecake has specific characteristics that set it apart:
- Extra cream cheese (five to six 8-ounce packages)
- Minimal additional ingredients (no frills or fancy flavorings)
- Dense, rich texture that’s still somehow creamy
- Tall height (usually 2-3 inches)
- Simple graham cracker or cookie crust
- Pure vanilla for flavoring
- No water bath during baking (unlike many other styles)
This simplicity is deceptive—achieving the perfect texture requires attention to detail and respect for the process.
Essential Equipment
Before diving into the recipe, let’s ensure you have the proper tools:
Springfield 9-inch Springform Pan
: A quality springform pan with a removable rim is non-negotiable for a proper cheesecake.
Stand Mixer with Paddle Attachment
: While you can use a hand mixer, a stand mixer makes the process much easier and produces a smoother result.
Instant-Read Thermometer
: The secret weapon of professional bakers—takes the guesswork out of determining when your cheesecake is perfectly done.
Offset Spatula
: Essential for creating a perfectly smooth top.
Heavy-Duty Aluminum Foil
: For wrapping the pan’s exterior (yes, we’ll discuss this further).
Cooling Rack
: Proper cooling is crucial for texture development.
Food Processor
: Makes quick work of the graham cracker crust.
The Perfect New York Cheesecake Recipe
Ingredients
For the Crust:
- 2 cups graham cracker crumbs (about 15-16 full sheets)
- 1/4 cup granulated sugar
- 1/2 cup (1 stick) unsalted butter, melted
- 1/4 teaspoon fine sea salt
For the Filling:
- 5 (8-ounce) packages full-fat cream cheese, room temperature
- 1 3/4 cups granulated sugar
- 3 tablespoons all-purpose flour
- 5 large eggs, room temperature
- 2 large egg yolks, room temperature
- 1/4 cup heavy cream
- 1 tablespoon pure vanilla extract
- 1 teaspoon lemon zest (optional but traditional)
Preparation Process
Crucial First Steps
The foundation of a perfect cheesecake begins before you even turn on the oven. These preliminary steps make all the difference:
- Remove cream cheese, eggs, and cream from the refrigerator at least 2 hours before baking. Room temperature ingredients blend more smoothly, preventing lumps.
- Preheat your oven to 350°F (175°C) for the crust phase.
- Prepare your springform pan by greasing it thoroughly, then wrapping the outside with heavy-duty aluminum foil. This prevents any butter from leaking during baking.
Creating the Perfect Crust
The crust provides the foundation—literally and figuratively—for your cheesecake. Here’s how to make it perfect:
- Combine graham cracker crumbs, sugar, and salt in a medium bowl.
- Pour in melted butter and mix until the texture resembles wet sand. A pro tip: test the mixture by pinching some between your fingers—it should hold together without being overly greasy.
- Press the mixture firmly and evenly into the bottom and about 1 inch up the sides of your springform pan. Use a flat-bottomed measuring cup for compaction—this ensures a solid foundation that won’t crumble when slicing.
- Bake the crust for 10 minutes until lightly golden and fragrant. Remove and cool completely on a wire rack.
- Reduce oven temperature to 325°F (165°C) for the filling.
The Filling: Where Art Meets Science
Creating the perfect filling is where most bakers go wrong. Pay close attention to these steps:
- In the bowl of your stand mixer fitted with the paddle attachment (not the whisk!), beat the cream cheese on medium-low speed until completely smooth, about 3-4 minutes. Scrape the bowl and beaters several times. This step is crucial—any lumps now will remain in your finished cheesecake.
- Gradually add the sugar and flour, beating until completely incorporated and scraping down the sides after each addition.
- Reduce mixer speed to low. Add eggs one at a time, beating just until each is incorporated. Over-beating introduces air, which causes cracks.
- Add egg yolks, followed by heavy cream, vanilla extract, and lemon zest if using. Mix on low until just combined.
- Give the filling a final gentle stir by hand with a silicone spatula, reaching the bottom of the bowl to ensure everything is evenly mixed.
Baking: The Critical Phase
This is where patience becomes your greatest virtue:
- Pour the filling into the cooled crust. Tap the pan gently on the counter a few times to release any trapped air bubbles.
- Smooth the top with an offset spatula.
- Place the springform pan on a baking sheet (to catch any potential leaks) and transfer to the middle rack of your 325°F oven.
- Bake for 1 hour and 15 minutes. The outer 2-3 inches should appear slightly puffed and set, but the center should still wobble like barely set Jell-O when the pan is gently shaken.
- For perfect doneness: The internal temperature should reach 150°F (65°C) at the center when measured with an instant-read thermometer.
- Without opening the oven door, turn off the heat and prop the door open with a wooden spoon. Allow the cheesecake to cool in the oven for 1 hour. This slow cooling prevents cracks from forming due to sudden temperature changes.
The Cooling Process: Patience Rewarded
Proper cooling is essential for texture development:
- After cooling in the oven, run a thin knife around the edge of the cheesecake to prevent it from sticking to the pan as it cools and contracts.
- Transfer to a cooling rack and cool completely at room temperature (about 2-3 hours).
- Cover with plastic wrap (not touching the surface) and refrigerate for at least 8 hours, preferably overnight. This resting period allows flavors to meld and the texture to set properly.
Troubleshooting Common Issues
Even experienced bakers encounter challenges. Here’s how to address the most common issues:
Texture Problems
| Issue | Possible Causes | Solutions |
|---|---|---|
| Lumpy filling | Cold cream cheese; inadequate mixing | Ensure ingredients are fully room temperature; beat cream cheese until completely smooth before adding other ingredients |
| Too dense/heavy | Overbeaten eggs; too much flour | Mix eggs just until incorporated; measure flour precisely |
| Gummy texture | Too much cornstarch or flour | Reduce or eliminate cornstarch; ensure proper measuring technique |
| Grainy texture | Sugar not fully dissolved; overbeating | Ensure sugar is completely incorporated; mix just until combined after adding eggs |
| Rubbery | Overbaking; too high temperature | Use thermometer to check doneness; follow cooling instructions carefully |
Structural Issues
| Issue | Possible Causes | Solutions |
|---|---|---|
| Surface cracks | Overbaking; rapid temperature changes; overbeating | Lower oven temperature; cool gradually; mix eggs minimally |
| Sunken center | Underbaking; opening oven during baking | Bake until proper internal temperature; avoid opening oven |
| Soufflé effect (rises then falls) | Too much air in batter | Mix on low speed; tap pan to remove air bubbles |
| Crust soggy or separated | Under-baked crust; butter leakage | Pre-bake crust thoroughly; ensure proper crust compaction |
| Sides collapsed | Sticking to pan during cooling | Run knife around edge immediately after baking |
Serving Suggestions
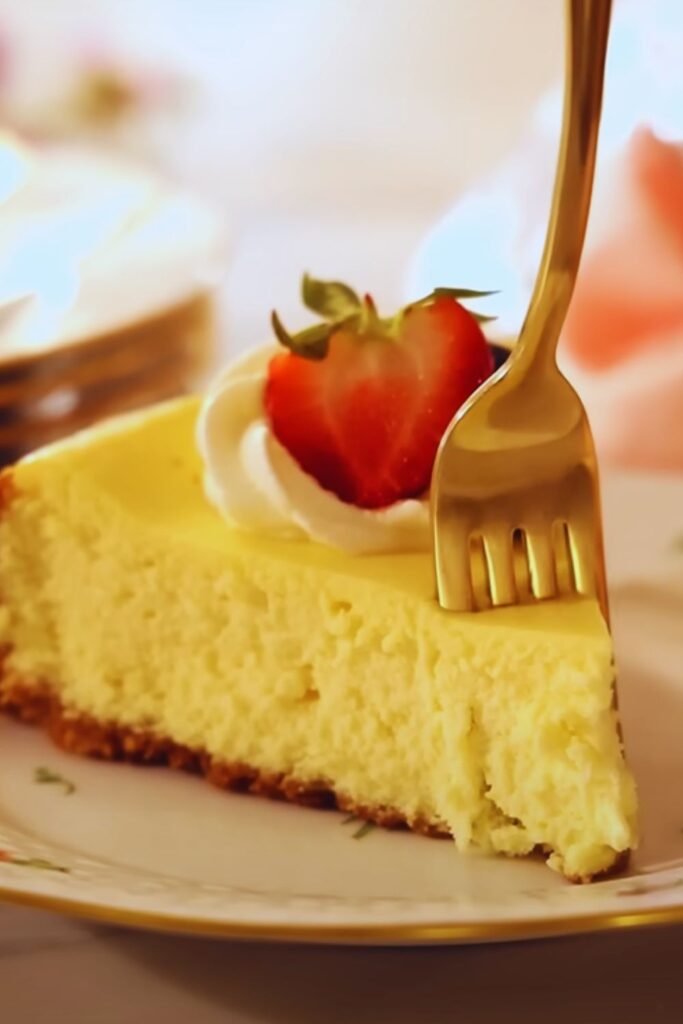
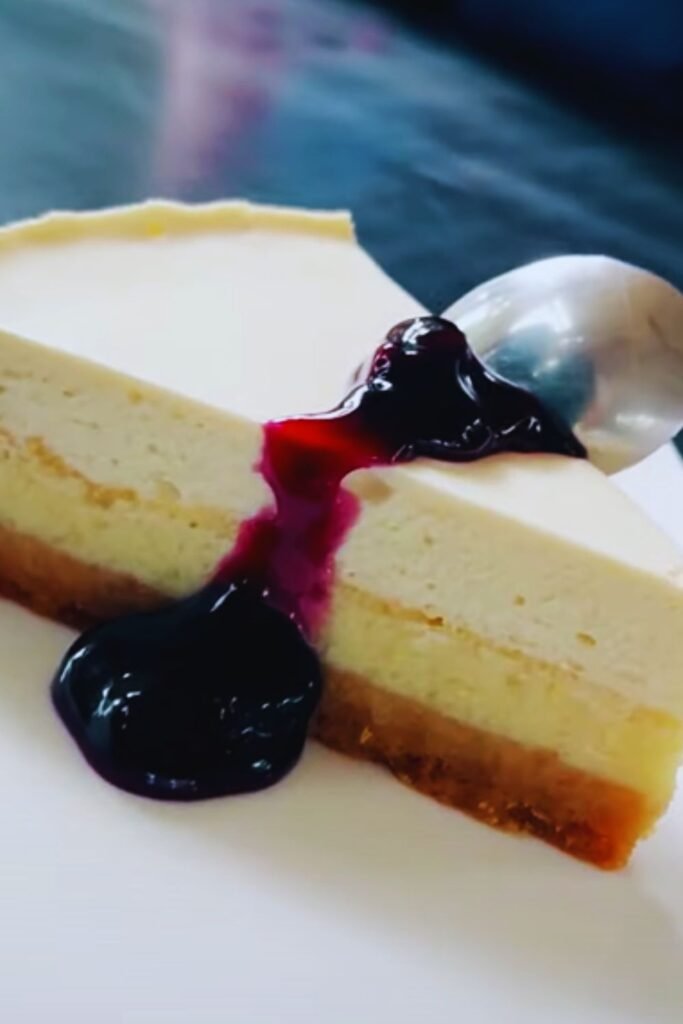
A true New York cheesecake shines on its own, but there are several classic accompaniments that enhance its glory:
Fresh Berries
: Strawberries, raspberries, or blueberries offer a tart contrast to the rich cheesecake. A light dusting of powdered sugar elevates the presentation.
Fruit Compotes
: Warm berry compotes, especially raspberry or cherry, provide delightful temperature and texture contrast.
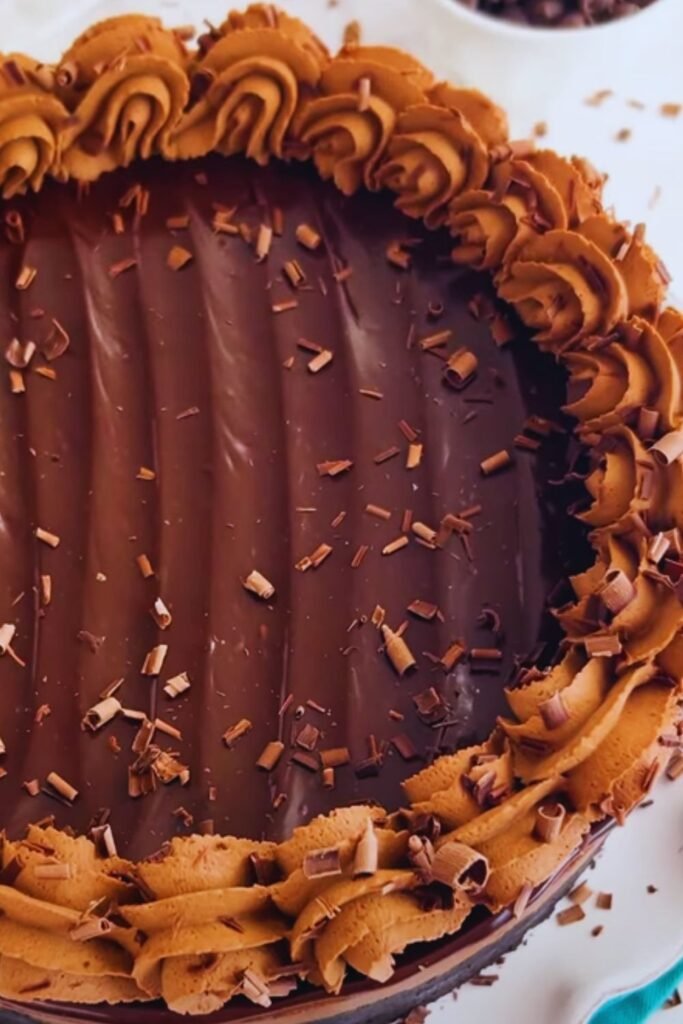
Chocolate Drizzle
: A light drizzle of high-quality dark chocolate adds visual appeal and flavor complexity.
Whipped Cream
: A small dollop of lightly sweetened whipped cream with vanilla bean specks adds an elegant touch.
Coffee or Tea
: The bitter notes in a good espresso or black tea beautifully complement the sweet, creamy nature of cheesecake.
For a truly authentic New York experience, serve slices generously cut (they should be tall and impressive) on chilled plates. Allow the cheesecake to sit at room temperature for about 30 minutes before serving—the flavors and texture are at their peak when the chill is just taken off.
Storage and Make-Ahead Tips
Proper storage ensures your cheesecake remains at its best:
- Refrigeration: Properly wrapped, cheesecake will keep in the refrigerator for up to 5 days.
- Freezing: Cheesecake freezes beautifully for up to 2 months. Wrap individual slices or the whole cake (minus any toppings) in plastic wrap, then aluminum foil.
- Thawing: Thaw frozen cheesecake overnight in the refrigerator. Never attempt to speed up thawing with heat.
- Make-Ahead Strategy: For special occasions, make your cheesecake 2-3 days in advance. The flavor actually improves after the first day as it mellows and deepens.
Variations: Respectful Adaptations
While purists argue that New York cheesecake should remain unadorned, there are some variations that maintain the integrity of the classic while offering subtle twists:
Citrus-Infused
Add the zest of one lemon and one orange to the batter. This brightens the flavor profile without overwhelming the cream cheese.
Marble Effect
Reserve 1 cup of the filling and mix with 3 ounces of melted, cooled dark chocolate. Drop spoonfuls onto the surface of the filled pan and swirl gently with a knife for a marbled effect.
Sour Cream Layer
Mix 2 cups sour cream with 3 tablespoons sugar and 1 teaspoon vanilla. After the cheesecake is almost set (about 45 minutes into baking), remove it, spread this mixture on top, and return to the oven to finish baking.
Brown Sugar Substitution
Replace one-third of the granulated sugar with light brown sugar for subtle caramel notes.
Cookie Crust Alternatives
While graham cracker is traditional, excellent results can be achieved with:
- Digestive biscuits (for a slightly maltier flavor)
- Vanilla wafers (for a more delicate sweetness)
- Gingersnaps (for a spicy contrast)
Q&A Section
Q: Why did my cheesecake crack down the middle?
The most common causes are overbeating the eggs (which incorporates too much air), baking at too high a temperature, or cooling too quickly. Next time, beat minimally after adding eggs, consider reducing your oven temperature by 25°F, and follow the slow cooling instructions precisely.
Q: Can I substitute low-fat cream cheese?
I strongly advise against it. Low-fat products have higher water content and different melting properties, resulting in a less stable cheesecake with inferior texture. This is one dessert where embracing the full-fat version yields significantly better results.
Q: Do I really need to let the ingredients come to room temperature?
Absolutely. Cold cream cheese simply won’t blend properly, resulting in a lumpy batter that never achieves that signature smooth texture. The extra 2 hours of waiting is worth it.
Q: My crust always sticks to the pan. What am I doing wrong?
Make sure you’re greasing the springform pan before pressing in the crust. After baking, run a thin knife around the edge before releasing the springform. Also, ensure you’re letting the cheesecake cool completely before attempting to remove it.
Q: How can I tell if my cheesecake is done without an instant-read thermometer?
Look for these signs: The edges should be slightly puffed and appear set, while the center 2-3 inches still wobbles slightly when gently shaken—similar to barely set Jell-O. If the entire surface is completely firm or starts to crack, it’s overbaked.
Q: Can I freeze leftover cheesecake?
Definitely! Cheesecake freezes beautifully for up to 2 months. Wrap individual slices tightly in plastic wrap, then in aluminum foil. Thaw overnight in the refrigerator for best results.
Q: Why does my cheesecake sink in the middle as it cools?
Some settling is normal, but significant sinking indicates underbaking. Next time, bake until the internal temperature reaches 150°F or ensure the outer 2-3 inches are set while the center still has a slight wobble.
Q: Is a water bath necessary for New York cheesecake?
Traditional New York cheesecake typically doesn’t use a water bath, which is one reason it has a more substantial texture than creamier European styles. However, if your oven has hot spots or you’re consistently getting cracks, a water bath can help provide more even baking.
Final Thoughts
Creating the perfect New York cheesecake is an exercise in patience and precision, but the results are well worth the effort. There’s something deeply satisfying about presenting this iconic dessert to friends and family, watching their expressions as they take that first perfect bite.
Remember that mastery comes with practice. Don’t be discouraged if your first attempt isn’t perfect—each cheesecake teaches you something new about your ingredients, your oven, and the baking process.
The classic New York cheesecake has endured for generations because it represents something timeless: the perfect balance of simplicity and indulgence. In a world of fleeting food trends, this dessert remains steadfast—rich, creamy, and utterly unforgettable.
Now, with your springform pan at the ready and these techniques in your arsenal, you’re prepared to create a truly authentic slice of New York in your own kitchen.

