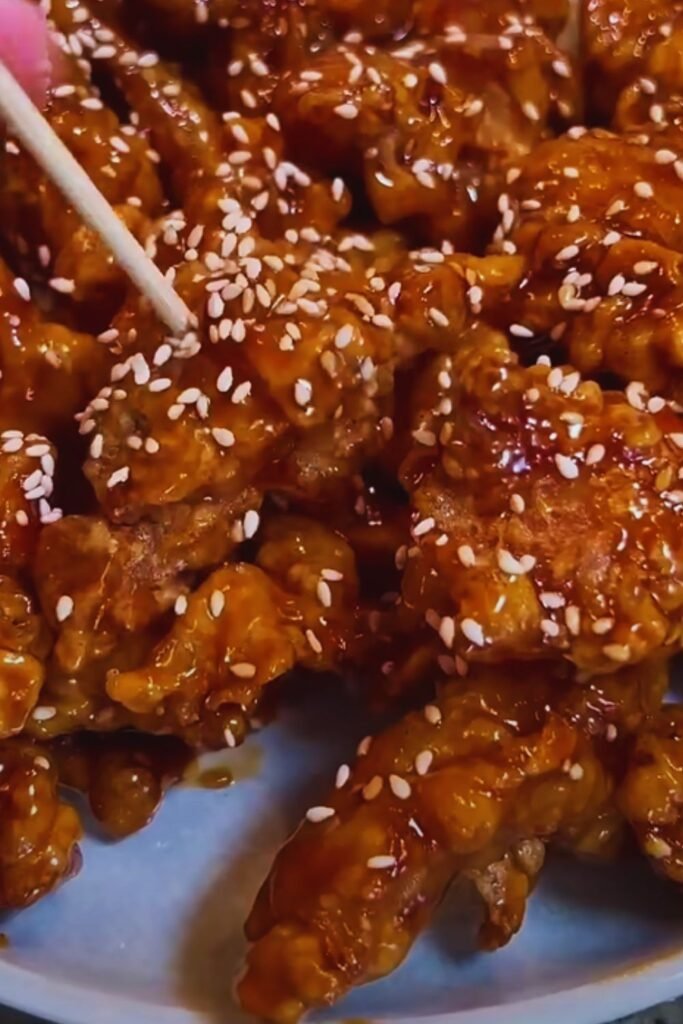
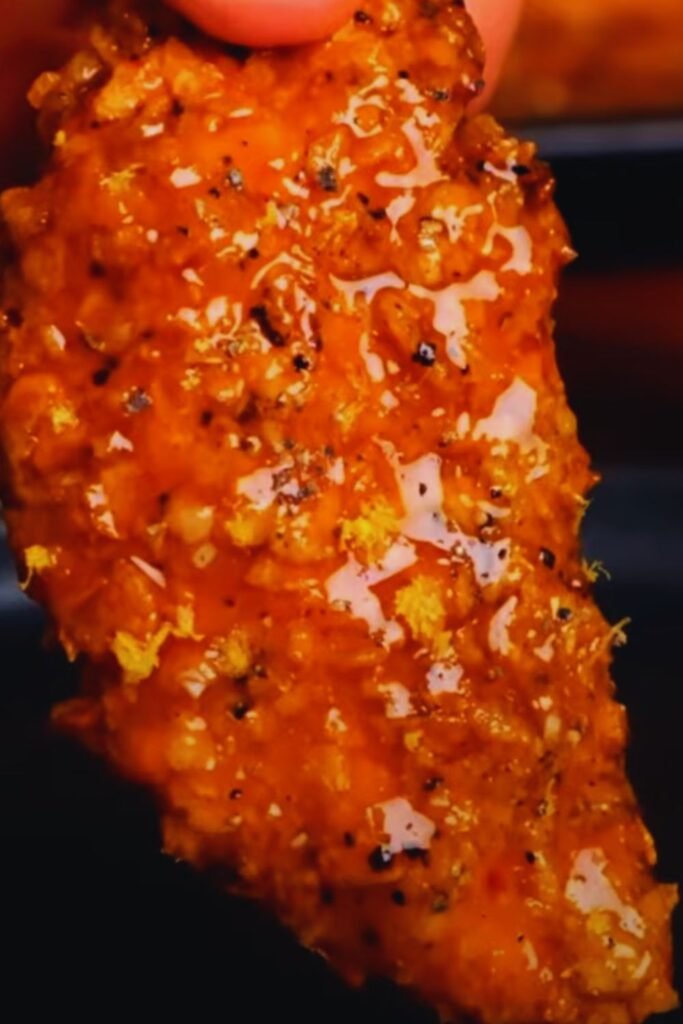
There’s something magical about the perfect sticky chicken tender – that gorgeous glaze, the tender meat, and that irresistible combination of sweet and savory flavors that keeps you coming back for more. After countless hours in my kitchen perfecting this recipe, I’m excited to share my foolproof method for creating the most delectable sticky chicken tenders you’ll ever taste.
The Secret Behind Perfect Sticky Chicken
Before we dive into the recipe, let me share why these chicken tenders are different from your average chicken strips. The magic lies in the double-coating process and a perfectly balanced sauce that creates that coveted sticky exterior while keeping the chicken incredibly juicy inside.
Essential Ingredients
For the Chicken:
- 2 pounds fresh chicken tenders (or chicken breasts cut into 1-inch strips)
- 2 cups all-purpose flour
- 3 large eggs
- 1 cup buttermilk
- 2 teaspoons garlic powder
- 2 teaspoons onion powder
- 1 tablespoon paprika
- 2 teaspoons black pepper
- 2½ teaspoons sea salt
For the Signature Sticky Sauce:
- ½ cup honey
- ⅓ cup soy sauce (low-sodium)
- 4 cloves garlic, minced
- 2 tablespoons rice vinegar
- 2 tablespoons brown sugar
- 1 tablespoon sesame oil
- 1 teaspoon cornstarch
- 1 teaspoon ginger paste
- ¼ teaspoon red pepper flakes
For Garnish:
- Toasted sesame seeds
- Finely chopped green onions
- Fresh cilantro leaves
Nutritional Information
| Nutrient | Amount per Serving |
|---|---|
| Calories | 385 |
| Protein | 28g |
| Carbohydrates | 42g |
| Fat | 12g |
| Fiber | 1.5g |
| Sugar | 18g |
| Sodium | 890mg |
| Iron | 2.5mg |
Serving size: 4 chicken tenders with sauce
The Perfect Preparation Method
- Preparation Time Breakdown:
- Prep time: 25 minutes
- Cook time: 20 minutes
- Total time: 45 minutes
- Yields: 6 servings
Step-by-Step Instructions
- Prepare the Coating Station
- In one shallow dish, combine flour with garlic powder, onion powder, paprika, black pepper, and 2 teaspoons of salt
- In another bowl, whisk together eggs and buttermilk
- Set up your breading station in this order: seasoned flour, egg mixture, and a clean plate

- Coating Process
- Pat chicken tenders dry with paper towels
- Season with remaining ½ teaspoon salt
- Dredge each tender in seasoned flour
- Dip in egg mixture
- Return to flour mixture for a second coating
- Place on a wire rack
- Cooking the Chicken
- Heat oil in a large skillet over medium-high heat
- Cook tenders for 4-5 minutes per side until golden brown
- Work in batches to avoid overcrowding
- Keep warm in a 200°F oven while preparing sauce
- Creating the Sticky Sauce
- Combine all sauce ingredients except cornstarch in a saucepan
- Bring to a simmer over medium heat
- Mix cornstarch with 2 tablespoons water
- Add to simmering sauce and cook until thickened
- Sauce should coat the back of a spoon
Pro Tips for Perfect Results
- Temperature Control
- Use a thermometer to ensure oil stays at 350°F
- Check chicken internal temperature reaches 165°F
- Let chicken rest 5 minutes before glazing
- Texture Perfection
- Double coating creates extra crispiness
- Don’t skip the buttermilk – it tenderizes the meat
- Allow coating to rest 5 minutes before frying
- Sauce Mastery
- Simmer sauce until it reaches nappage consistency
- Apply sauce in multiple thin layers
- Reserve some sauce for dipping
Storage and Reheating
Storage Options:
- Refrigerate: Up to 3 days in airtight container
- Freeze: Up to 2 months (unglazed only)
- Sauce: Up to 1 week refrigerated
Reheating Methods:
- Oven: 350°F for 10-12 minutes
- Air Fryer: 370°F for 4-5 minutes
- Avoid microwave to maintain crispiness
Serving Suggestions
These sticky chicken tenders pair beautifully with:
- Steamed jasmine rice
- Asian-style coleslaw
- Roasted broccoli with garlic
- Cucumber salad with rice vinegar dressing
- Sweet potato fries
- Sesame noodles
Common Questions & Answers
Q: Can I make these chicken tenders gluten-free?
A: Yes! Replace all-purpose flour with cornstarch or your favorite gluten-free flour blend, and use tamari instead of soy sauce.
Q: Why aren’t my chicken tenders getting crispy?
A: The most common reason is oil temperature. Too low, and they’ll be greasy; too high, and they’ll burn before cooking through. Maintain 350°F for perfect results.
Q: Can I make the sauce less sweet?
A: Absolutely! Reduce the honey and brown sugar by half, and add an extra tablespoon of rice vinegar for balance.
Q: Is it possible to bake these instead of frying?
A: Yes, though the texture will be different. Bake at 425°F for 15-18 minutes, flipping halfway through. Spray with oil for better browning.
Q: My sauce isn’t thickening properly. What am I doing wrong?
A: Make sure your cornstarch is fully dissolved in cold water before adding it to the hot sauce. Also, the sauce needs to come to a simmer after adding the cornstarch to achieve full thickening power.
Troubleshooting Guide
| Problem | Cause | Solution |
|---|---|---|
| Soggy coating | Oil too cool | Maintain 350°F oil temperature |
| Sauce too thick | Too much cornstarch | Add warm water, 1 tablespoon at a time |
| Burnt exterior | Oil too hot | Use thermometer, reduce heat if needed |
| Undercooked interior | Pieces too thick | Cut chicken to even 1-inch thickness |
| Sauce not sticking | Chicken too hot | Let chicken cool slightly before glazing |
Recipe Variations
- Spicy Asian
- Add gochujang to sauce
- Increase red pepper flakes
- Garnish with kimchi
- Tropical Twist
- Replace honey with pineapple juice
- Add minced mango to sauce
- Garnish with toasted coconut
- Teriyaki Style
- Use mirin instead of rice vinegar
- Add crushed pineapple to sauce
- Finish with Japanese furikake
Remember, cooking is about making the recipe your own. Don’t be afraid to experiment with different flavors while keeping the basic technique intact. The key is maintaining that perfect balance of crispy coating, juicy chicken, and irresistible sticky sauce.
I hope you enjoy making these sticky chicken tenders as much as I enjoy sharing this recipe with you. Don’t forget to tag your creations on social media – I love seeing how you make this recipe your own!