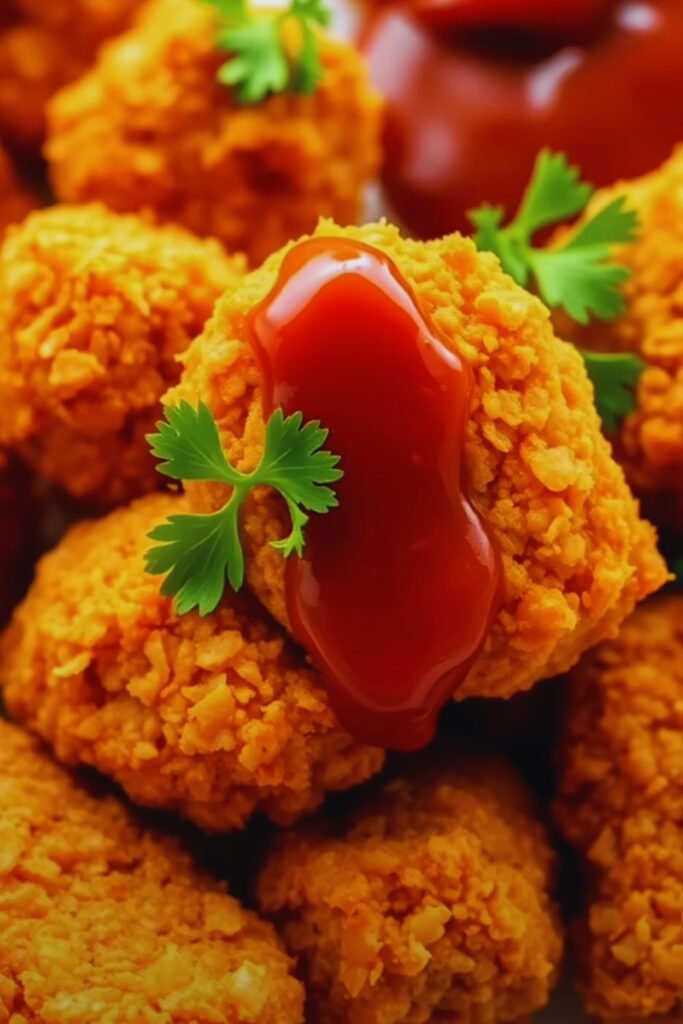
Do you ever find yourself reaching for those frozen chicken nuggets in the grocery store freezer, only to flip over the package and feel your stomach turn at the ingredient list? I’ve been there too. As someone who values feeding my family wholesome food but also lives in the real world where time is precious and picky eaters reign supreme, I knew I needed to create a better alternative.
These homemade baked chicken nuggets have become a staple in our house, and once you try them, I’m confident they’ll become a favorite in yours too. They’re crispy on the outside, tender on the inside, and made with ingredients you can feel good about.
Why Make Homemade Chicken Nuggets?
When I first started making these nuggets, it was out of necessity. My youngest has some food sensitivities, and finding store-bought options that didn’t trigger reactions was nearly impossible. But what began as a solution to a dietary challenge quickly became a family favorite for several reasons:
- Control over ingredients: No mysterious additives, preservatives, or fillers
- Customizable: Easily adapt to dietary needs (gluten-free, egg-free, dairy-free)
- Better nutrition: Higher quality protein and less sodium than processed versions
- Budget-friendly: Less expensive than premium frozen nuggets
- Kid-approved: Even the pickiest eaters love these!
I’ve perfected this recipe over dozens of batches, tweaking and adjusting until I found the perfect combination of ease and deliciousness. Let me share with you my tried-and-true method for making chicken nuggets that will have everyone at your table asking for seconds.
Ingredients You’ll Need
For the basic chicken nuggets, you’ll need:
- 1 pound boneless, skinless chicken breasts
- 1 cup breadcrumbs (regular or gluten-free)
- 1/4 cup grated parmesan cheese (optional)
- 1 teaspoon garlic powder
- 1 teaspoon onion powder
- 1/2 teaspoon paprika
- 1/2 teaspoon dried oregano
- 1/4 teaspoon black pepper
- 1/2 teaspoon salt
- 2 eggs (see egg-free option below)
- 2 tablespoons olive oil or avocado oil
Equipment Needed
Nothing fancy here, just basic kitchen tools:
- Cutting board and sharp knife
- Two shallow bowls
- Baking sheet
- Parchment paper
- Meat thermometer (optional but helpful)
Step-by-Step Instructions
Preparing the Chicken
- Preheat your oven to 400°F (200°C) and line a baking sheet with parchment paper.
- Cut the chicken breasts into 1-inch cubes or nugget-sized pieces. Try to make them fairly uniform in size for even cooking.
- Pat the chicken pieces dry with paper towels. This is an important step that helps the coating stick better.
Making the Coating
- In a shallow bowl, combine the breadcrumbs, parmesan (if using), garlic powder, onion powder, paprika, oregano, pepper, and salt. Mix well.
- In another shallow bowl, beat the eggs until well combined.
- If using the egg-free option (see variations below), prepare your egg substitute in this bowl instead.
Coating the Nuggets
- Working with a few pieces at a time, dip the chicken in the egg mixture, allowing excess to drip off.
- Roll the chicken in the breadcrumb mixture, pressing gently to ensure the coating adheres well.
- Place the coated nuggets on the prepared baking sheet, leaving a little space between each piece.
- Once all nuggets are coated, drizzle or spray them lightly with olive oil. This helps them get that beautiful golden color and crispy texture.
Baking to Perfection
- Bake in the preheated oven for 15-18 minutes, flipping halfway through cooking time.
- The nuggets are done when they reach an internal temperature of 165°F (74°C) and are golden brown on the outside.
- Let rest for 5 minutes before serving (if you can keep little hands away that long!).
Gluten-Free Variation
Making these nuggets gluten-free is incredibly simple:
- Replace regular breadcrumbs with certified gluten-free breadcrumbs
- Double-check all your seasonings to ensure they’re certified gluten-free (most are, but some may contain fillers)
- If using parmesan, verify it’s from a gluten-free source
I’ve found that the gluten-free version is just as delicious as the original. In fact, we make the gluten-free version exclusively now, and nobody can tell the difference!
Egg-Free Variation
For those avoiding eggs, I’ve tested several alternatives. My favorite egg substitutes for this recipe are:
- Buttermilk soak: Soak chicken pieces in 1/2 cup buttermilk for 20 minutes, then proceed with breadcrumb coating. The buttermilk helps the coating adhere and keeps the chicken moist.
- Yogurt coating: Mix 1/2 cup plain yogurt with 1 tablespoon Dijon mustard. Dip chicken in this mixture before coating with breadcrumbs.
- Flax egg: Mix 2 tablespoons ground flaxseed with 6 tablespoons warm water. Let sit for 5 minutes until it becomes gel-like, then use as you would eggs.
For those with dairy allergies as well, the flax egg works wonderfully as a completely allergen-free option.
Make-Ahead and Storage Tips
One of the best things about these nuggets is that they’re perfect for batch cooking:
Refrigerator Storage
- Cooked nuggets will keep in an airtight container in the refrigerator for up to 3 days.
- Reheat in a 350°F (175°C) oven for 10 minutes until heated through.
Freezer Instructions
For make-ahead meal prep:
- After coating the nuggets, place them on a parchment-lined baking sheet in a single layer.
- Freeze for 1-2 hours until solid.
- Transfer to a freezer-safe container or bag and store for up to 3 months.
- When ready to cook, bake frozen nuggets at 400°F (200°C) for 20-25 minutes, flipping halfway through.
If freezing after cooking:
- Allow nuggets to cool completely.
- Freeze in a single layer, then transfer to a freezer container.
- Reheat frozen cooked nuggets in a 375°F (190°C) oven for 15 minutes.
Nutritional Comparison
I was curious about how my homemade nuggets stacked up against store-bought versions, so I did some research. Here’s what I found:
| Nutrient | Homemade Nuggets (per serving) | Average Store Bought (per serving) |
|---|---|---|
| Calories | 220 | 290 |
| Protein | 22g | 14g |
| Fat | 10g | 17g |
| Carbs | 12g | 18g |
| Sodium | 310mg | 600mg |
| Ingredients | 11 whole food ingredients | 20+ including additives |
| Cost | $0.89 per serving | $1.50+ per serving |
*A serving is approximately 4-5 nuggets
As you can see, the homemade version wins in virtually every category!
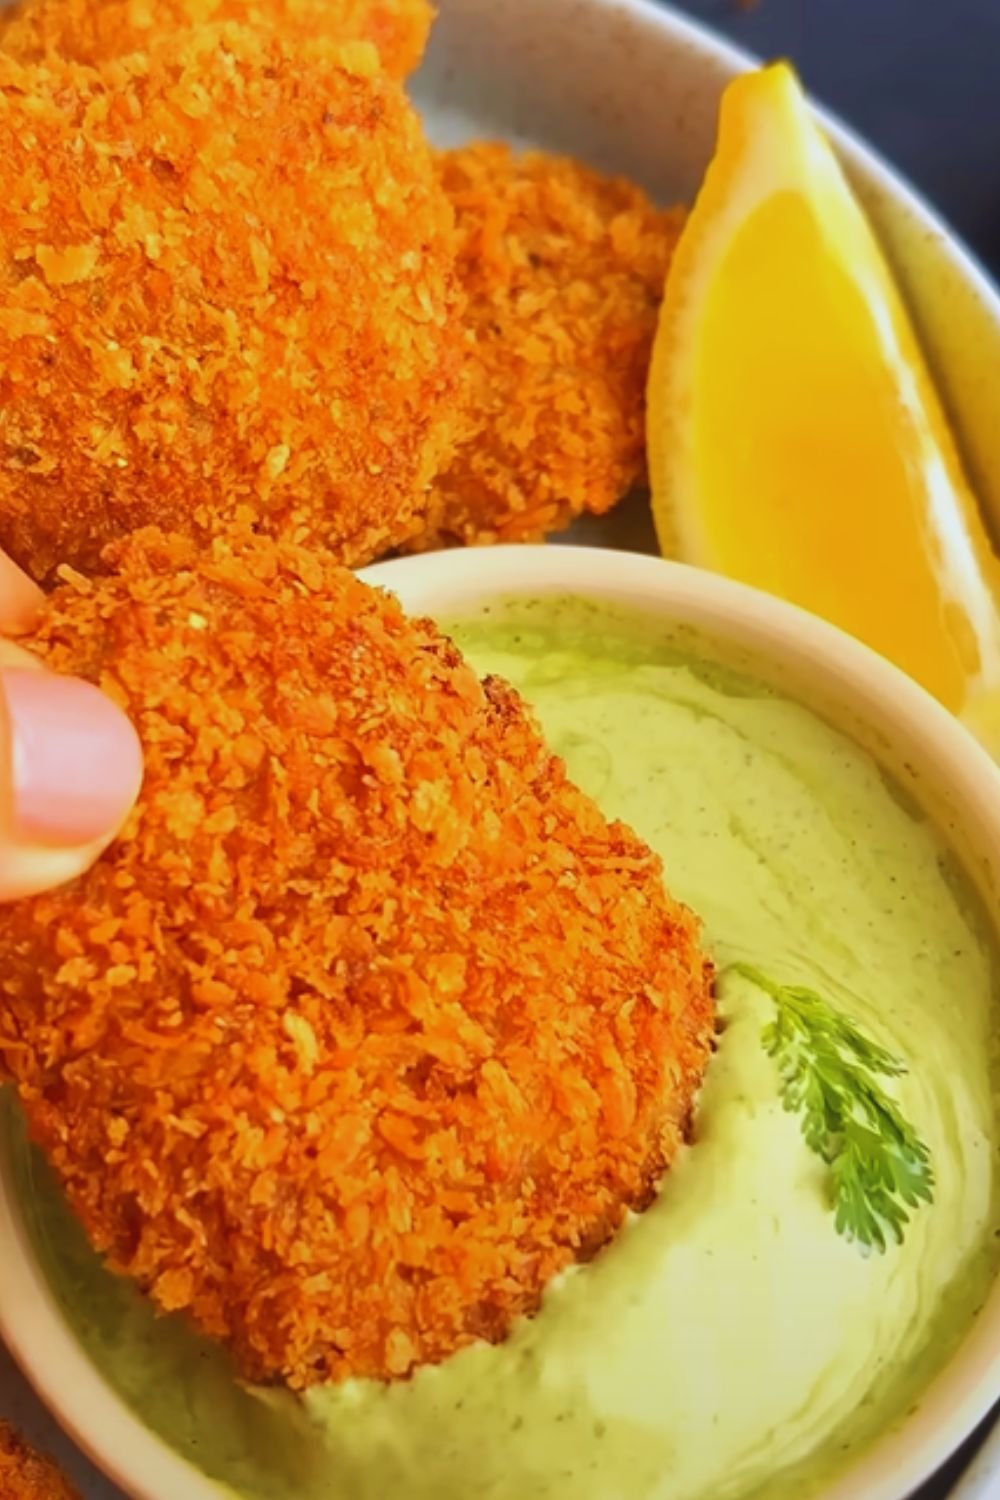
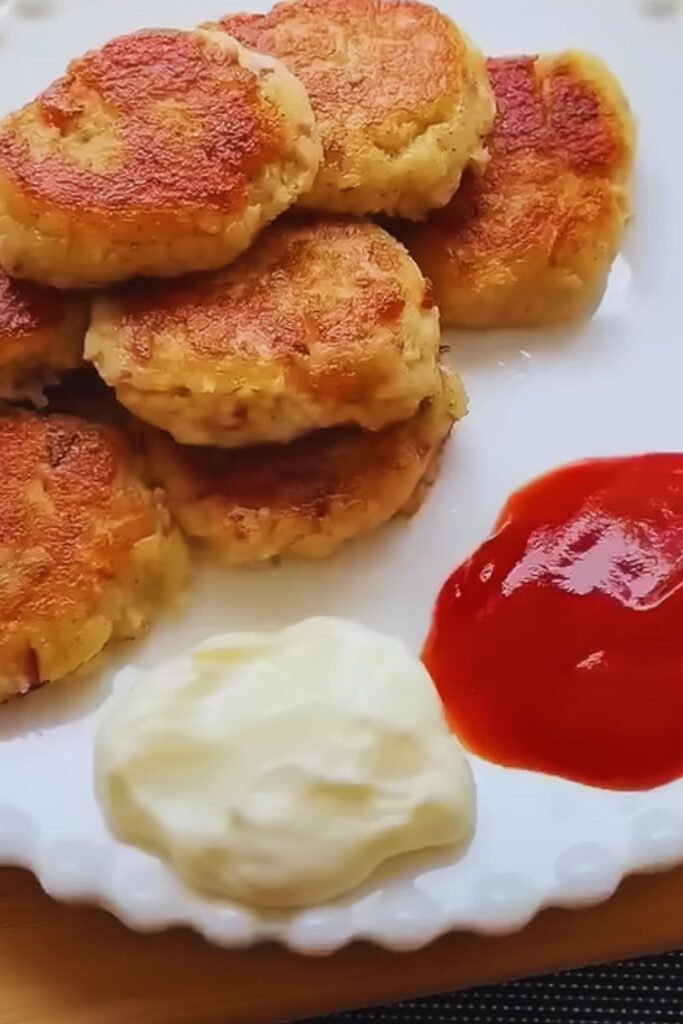
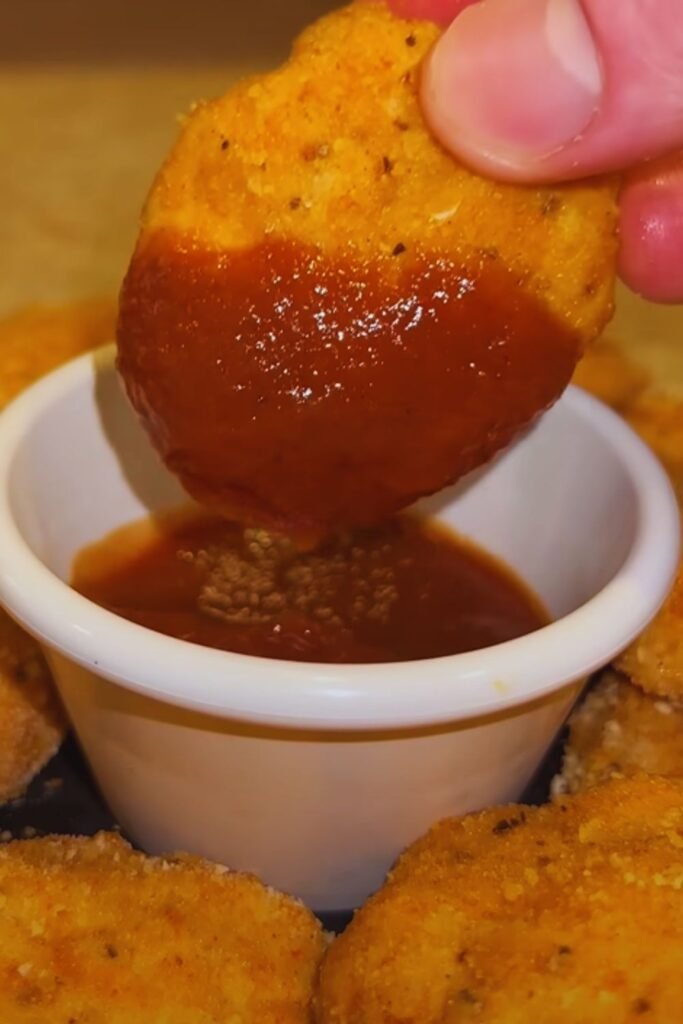
Kid-Friendly Dipping Sauce Ideas
What’s a chicken nugget without something delicious to dip it in? Here are some of our favorite homemade dipping sauce options:
Honey Mustard (Our Favorite!)
- 2 tablespoons honey
- 2 tablespoons Dijon mustard
- 1 tablespoon mayonnaise
- Splash of lemon juice
Simple BBQ Sauce
- 1/4 cup ketchup
- 1 tablespoon molasses
- 1 teaspoon apple cider vinegar
- 1/4 teaspoon garlic powder
- 1/4 teaspoon smoked paprika
Herbed Yogurt Dip
- 1/4 cup plain Greek yogurt
- 1 tablespoon fresh chopped herbs (dill, parsley, chives)
- 1 small garlic clove, minced
- Squeeze of lemon juice
- Pinch of salt
Serving Suggestions
Turn these nuggets into a complete meal with these simple sides:
- Sweet potato fries or regular baked fries
- Steamed broccoli with a squeeze of lemon
- Simple green salad with ranch dressing
- Cucumber and carrot sticks
- Homemade coleslaw
- Corn on the cob
- Apple slices or grapes for a sweet contrast
For adults, I like to serve these on top of a big salad with avocado and a tangy vinaigrette. They’re also delicious chopped up in a wrap with lettuce, tomato, and a drizzle of ranch.
Flavor Variations to Try
Once you’ve mastered the basic recipe, consider these tasty variations:
Ranch Nuggets
Add 1 tablespoon of ranch seasoning mix to your breadcrumb mixture.
Parmesan Herb
Double the parmesan cheese and add 1 tablespoon of Italian herb blend.
Spicy Nuggets
Add 1/4 teaspoon cayenne pepper and 1/2 teaspoon chili powder to the breadcrumb mixture.
Coconut Crusted
Replace half the breadcrumbs with unsweetened shredded coconut for a tropical twist.
Troubleshooting Common Issues
Even with a simple recipe like this, things can occasionally go wrong. Here are solutions to common problems:
Issue: Coating falls off during baking
Solutions:
- Make sure chicken is thoroughly patted dry before coating
- Press coating firmly onto chicken pieces
- Let coated nuggets sit for 5-10 minutes before baking to help coating adhere
- Spray or drizzle with oil after coating but before baking
Issue: Nuggets are dry inside
Solutions:
- Don’t overcook! Use a meat thermometer to check for doneness
- Try brining the chicken first (soak in salt water for 15-30 minutes, then rinse and pat dry)
- Use chicken thighs instead of breasts for juicier nuggets
Issue: Nuggets aren’t crispy enough
Solutions:
- Make sure oven is fully preheated before baking
- Don’t overcrowd the baking sheet
- Use the convection setting on your oven if available
- Flip nuggets halfway through baking
- Broil for the last 1-2 minutes for extra crispiness
Frequently Asked Questions
Q: Can I use chicken thighs instead of breasts?
Absolutely! Chicken thighs have more fat and flavor, which can make the nuggets juicier. Just cut them into similarly sized pieces and follow the recipe as written. You might need to increase the cooking time by 2-3 minutes.
Q: How do I make these dairy-free?
Skip the parmesan cheese in the coating and make sure your breadcrumbs don’t contain dairy. For the egg-free version, use the flax egg option rather than buttermilk or yogurt.
Q: Can I air fry these nuggets instead of baking?
Yes! Air fry at 400°F (200°C) for 10-12 minutes, shaking the basket halfway through. You might not need to add any oil, as the air fryer will create a crispy exterior naturally.
Q: What can I use instead of breadcrumbs for a grain-free option?
Crushed pork rinds make an excellent grain-free coating. Almond flour mixed with a little coconut flour also works well, though it won’t get quite as crispy.
Q: How can I tell when the nuggets are done without a meat thermometer?
Cut into the thickest nugget – the meat should be white throughout with no pink, and the juices should run clear. But honestly, a meat thermometer is one of the best investments for your kitchen if you cook meat regularly!
Q: Can I use this same recipe for fish nuggets?
Yes! This coating works wonderfully with firm white fish like cod or halibut. Just reduce the cooking time to 10-12 minutes, as fish cooks more quickly than chicken.
Final Thoughts
There’s something incredibly satisfying about making a food that’s typically processed from scratch. Not only are these homemade chicken nuggets healthier and more economical than store-bought versions, but they also taste better – much better!
I hope this recipe becomes a staple in your meal rotation like it has in mine. The smile on my kids’ faces when they see these nuggets on their plates makes the little bit of extra effort completely worthwhile. And knowing exactly what’s in their food gives me peace of mind.
If you try this recipe, I’d love to hear how it turns out for you! Feel free to experiment with the seasonings and make it your own. Happy cooking!