Have you ever found yourself staring at a bag of frozen shrimp, wondering how to transform it into something delicious without the hassle of thawing? I’ve discovered that air fryer frozen shrimp is not just a convenient option – it’s a game-changer for quick, healthy meals that taste amazing. Today, I’m sharing my foolproof method for cooking perfectly tender and flavorful shrimp straight from the freezer.
Why You’ll Love This Recipe
After countless experiments with my air fryer, I’ve found that cooking frozen shrimp this way offers several advantages:
- Ready in just 10 minutes from freezer to table
- No need for advance planning or thawing
- Creates perfectly cooked, tender shrimp every time
- Ideal for both quick dinners and party appetizers
- Healthier than deep-fried alternatives
- Versatile – can be seasoned countless ways
Essential Ingredients
For the basic recipe, you’ll need:
- 1 pound frozen raw shrimp (21-25 count size)
- 2 tablespoons olive oil
- 1 teaspoon garlic powder
- 1 teaspoon paprika
- ½ teaspoon sea salt
- ¼ teaspoon black pepper
- 1 lemon (optional)
- Fresh parsley for garnish (optional)
Equipment Needed
- Air fryer (any model works)
- Measuring spoons
- Mixing bowl
- Tongs
- Paper towels
Detailed Nutritional Information
| Nutrient | Amount per Serving |
|---|---|
| Calories | 185 |
| Protein | 24g |
| Total Fat | 8g |
| Saturated Fat | 1.5g |
| Cholesterol | 170mg |
| Sodium | 890mg |
| Total Carbohydrates | 2g |
| Dietary Fiber | 0g |
| Sugar | 0g |
| Iron | 2mg |
| Calcium | 55mg |
| Vitamin D | 0mcg |
| Potassium | 200mg |
Serving size: 4 oz (approximately 6-7 large shrimp)
Step-by-Step Instructions
1. Prepare the Shrimp
Before starting, I always make sure to:
- Remove any ice crystals by rinsing the frozen shrimp under cold water
- Pat them dry thoroughly with paper towels
- If the shrimp have tails, decide whether to keep them on (they make great handles for appetizers) or remove them
- Check that all shrimp are similarly sized for even cooking
2. Season the Shrimp
My perfect seasoning method:
- Place shrimp in a large bowl
- Drizzle with olive oil
- Add garlic powder, paprika, salt, and pepper
- Toss gently until evenly coated
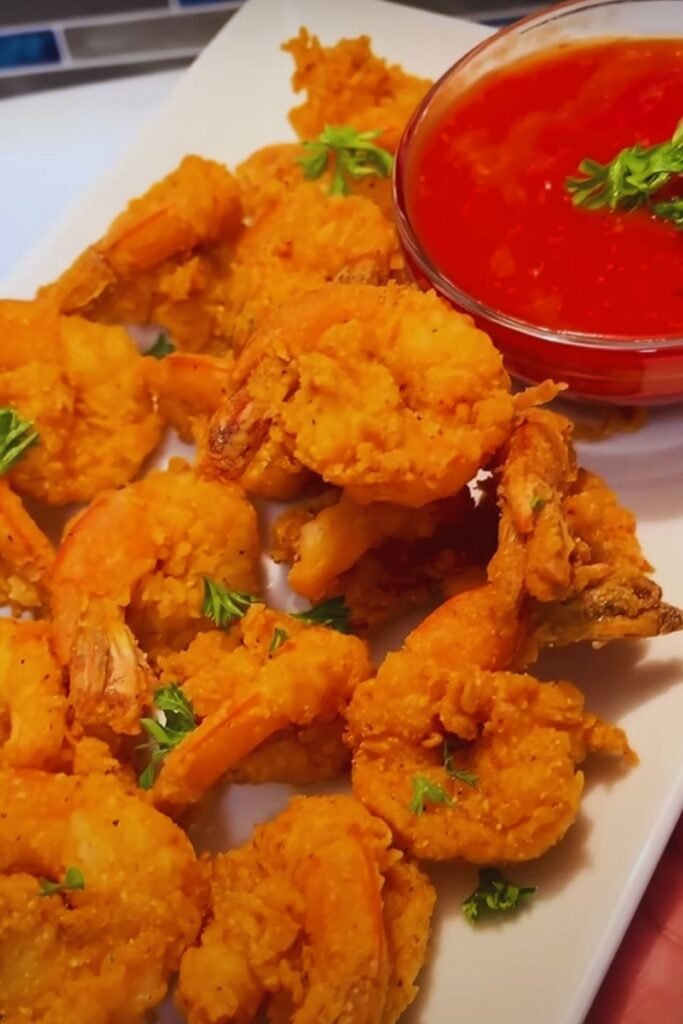
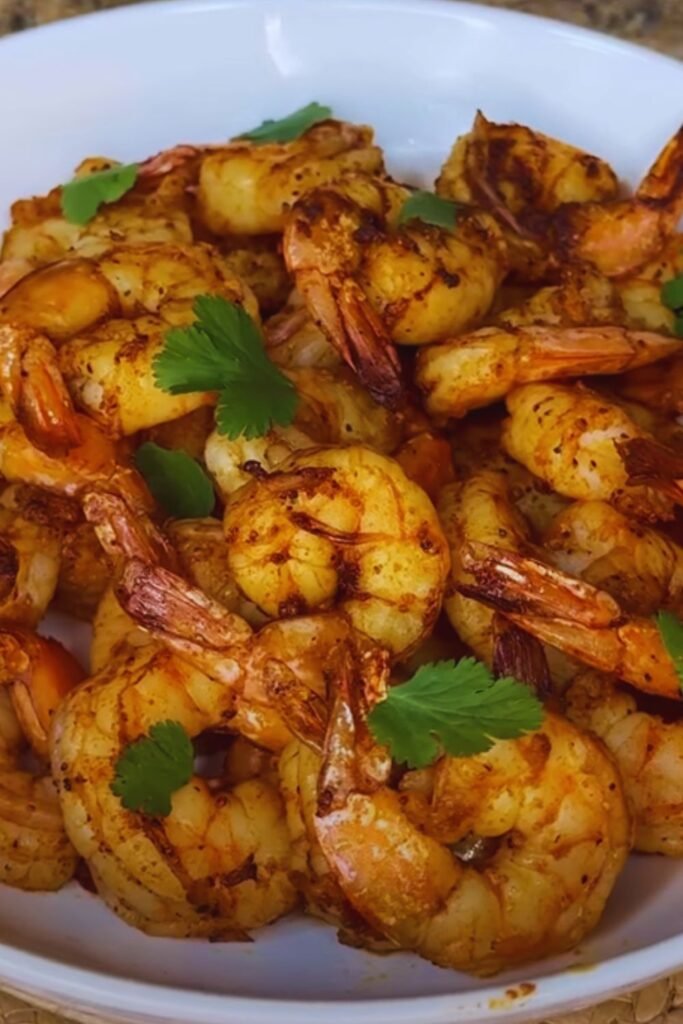
3. Air Frying Process
For perfect results, follow these steps:
- Preheat air fryer to 400°F (204°C)
- Arrange shrimp in a single layer in the air fryer basket
- Cook for 5-7 minutes, shaking the basket halfway through
- Check internal temperature (should reach 145°F/63°C)
4. Finishing Touches
To elevate the dish:
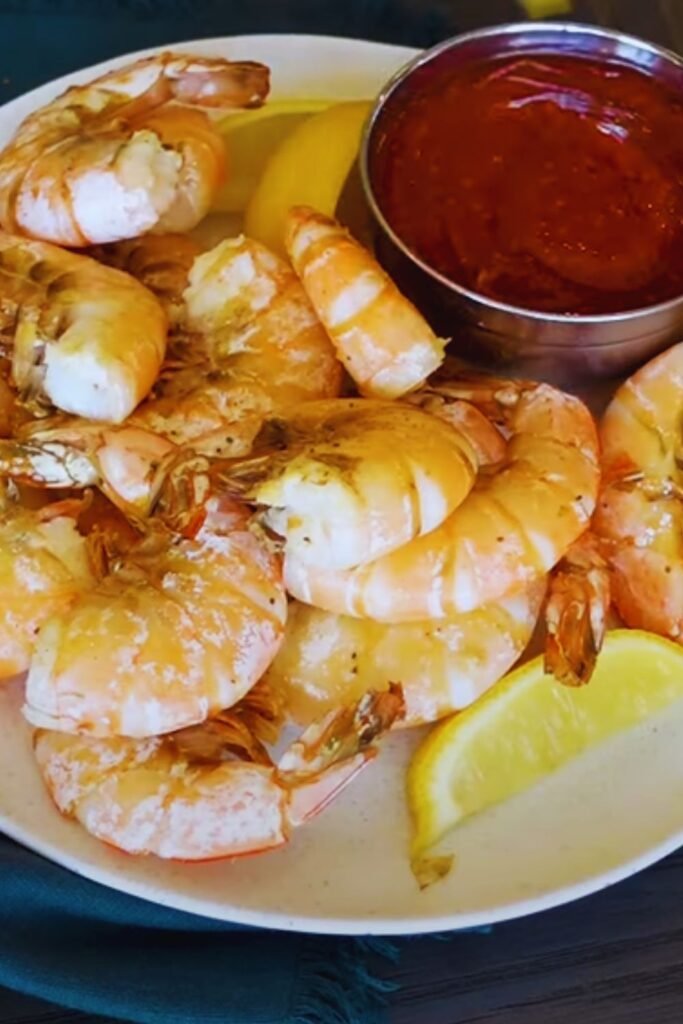
- Squeeze fresh lemon juice over the hot shrimp
- Sprinkle with chopped fresh parsley
- Serve immediately while hot
Pro Tips from My Kitchen
Through extensive testing, I’ve discovered these crucial tips:
- Don’t overcrowd the basket – cook in batches if necessary
- Shake the basket vigorously at the halfway point
- Add seasoning before cooking, but add fresh herbs after
- Keep sizes consistent for even cooking
- Use raw frozen shrimp rather than pre-cooked for best results
Common Mistakes to Avoid
In my experience, these are the most frequent pitfalls:
- Overcrowding the air fryer basket
- Skipping the preheating step
- Not patting the shrimp dry
- Using inconsistent shrimp sizes
- Overcooking (leads to rubber-like texture)
Serving Suggestions
I love serving air fryer shrimp in various ways:
- Over a bed of garlic butter pasta
- With fresh steamed vegetables
- Alongside quinoa or brown rice
- As part of a healthy salad
- With cocktail sauce as an appetizer
Storage and Reheating
For best results:
- Store leftovers in an airtight container in the refrigerator for up to 3 days
- Reheat in the air fryer at 350°F for 2-3 minutes
- Avoid microwaving as it can make the shrimp rubbery
- Do not refreeze once cooked
Recipe Variations
Here are some of my favorite seasoning combinations:
Cajun Style
- 2 teaspoons Cajun seasoning
- 1 tablespoon butter, melted
- 1 teaspoon lemon juice
Garlic Parmesan
- 3 cloves minced garlic
- ¼ cup grated Parmesan
- 1 teaspoon Italian herbs
Asian Inspired
- 1 tablespoon soy sauce
- 1 teaspoon sesame oil
- 1 teaspoon ginger paste
- 1 clove minced garlic
Frequently Asked Questions
Q: Can I use precooked frozen shrimp?
While possible, I recommend using raw frozen shrimp for better texture and flavor. If using precooked, reduce cooking time to 3-4 minutes to prevent toughening.
Q: Do I need to defrost the shrimp first?
No! That’s the beauty of this recipe. Cooking from frozen works perfectly and saves time.
Q: How do I know when the shrimp are done?
They should be pink, slightly curled (but not tight), and reach an internal temperature of 145°F (63°C).
Q: Can I cook different sizes of shrimp?
Yes, but cooking times will vary. Larger shrimp (16-20 count) need 7-8 minutes, while smaller ones (31-35 count) need 4-5 minutes.
Q: Why are my shrimp rubbery?
Overcooking is usually the culprit. Watch them closely and remove as soon as they turn pink and opaque.
Troubleshooting Guide
| Problem | Cause | Solution |
|---|---|---|
| Rubbery texture | Overcooking | Reduce cooking time by 1-2 minutes |
| Uneven cooking | Overcrowded basket | Cook in smaller batches |
| Not crispy enough | Too much moisture | Pat dry thoroughly before cooking |
| Bland taste | Insufficient seasoning | Season generously before cooking |
| Burning | Temperature too high | Reduce to 375°F and monitor closely |
Health Benefits
I appreciate that this cooking method offers numerous health advantages:
- Low in calories but high in protein
- Rich in omega-3 fatty acids
- Good source of iodine
- High in antioxidants
- Excellent source of B vitamins
- Contains essential minerals
Cost-Saving Tips
To make this recipe budget-friendly:
- Buy frozen shrimp in bulk when on sale
- Choose peeled shrimp to reduce prep time
- Use basic seasonings you already have
- Store properly to prevent freezer burn
- Cook the right portion size to avoid waste
Special Dietary Considerations
This recipe is naturally:
- Gluten-free
- Low-carb
- Keto-friendly
- Dairy-free (unless using butter-based variations)
- Paleo-compliant
For specific diets, modify seasonings accordingly while maintaining the basic cooking method.