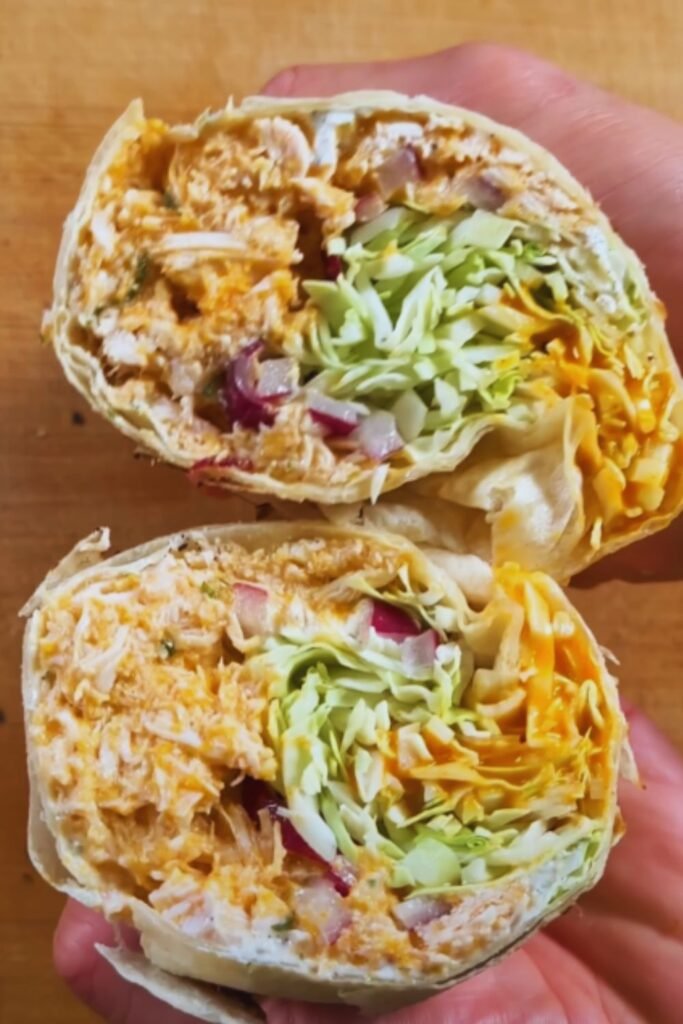
There’s something magical about the combination of tender chicken, melted cheese, and garlic-infused flavors all wrapped in a warm tortilla. I’ve been perfecting my Cheesy Garlic Chicken Wraps recipe for years, and it’s become my family’s most requested dinner. These wraps strike the perfect balance between comfort food indulgence and wholesome ingredients, making them ideal for busy weeknights when you want something satisfying without spending hours in the kitchen.
What makes these wraps truly special is their versatility. You can customize them with different cheeses, add extra vegetables, or spice them up with your favorite hot sauce. But the foundation—juicy garlic-infused chicken, melted cheese, and a perfectly toasted wrap—remains consistently delicious.
I first created this recipe when I needed to use up leftover rotisserie chicken and some tortillas that were about to expire. What started as a simple kitchen clean-out turned into a dish that now regularly appears on our weekly menu. The combination of convenience and flavor has made these wraps a staple in my cooking repertoire.
The Magic Behind Perfect Cheesy Garlic Chicken Wraps
Before diving into the recipe itself, let me share some key insights that elevate these wraps from good to extraordinary:
- The chicken marinade matters: Even a quick 15-minute marinade makes a huge difference in flavor
- Toast the wraps: This extra step prevents soggy wraps and adds wonderful texture
- Layer ingredients strategically: Putting cheese directly next to the hot tortilla ensures proper melting
- Rest before cutting: Giving the wraps 2-3 minutes to rest helps everything set properly
I’ve discovered these techniques through years of trial and error, and they truly make the difference between an average wrap and one that has everyone asking for seconds.
Ingredients You’ll Need
For 4 substantial wraps, gather these ingredients:
| Ingredient | Quantity | Notes |
|---|---|---|
| Boneless, skinless chicken breasts | 1 pound (about 2 medium breasts) | Thighs work wonderfully too for extra juiciness |
| Large flour tortillas | 4 (10-12 inch size) | Look for the “burrito size” option |
| Shredded cheese blend | 2 cups | A mixture of mozzarella and cheddar works best |
| Fresh garlic | 4-5 cloves | Minced or pressed |
| Olive oil | 3 tablespoons | Extra virgin preferred |
| Butter | 2 tablespoons | Unsalted |
| Fresh spinach | 2 cups | Baby spinach works best |
| Red bell pepper | 1 medium | Thinly sliced |
| Red onion | 1/2 medium | Thinly sliced |
| Fresh parsley | 1/4 cup | Finely chopped |
| Italian seasoning | 1 tablespoon | Look for blends with oregano, basil, and thyme |
| Garlic powder | 1 teaspoon | In addition to fresh garlic for depth of flavor |
| Salt | 1 teaspoon | Adjust to taste |
| Black pepper | 1/2 teaspoon | Freshly ground preferred |
| Sour cream | 1/2 cup | For serving |
| Hot sauce | To taste | Optional, for heat lovers |
The secret to these incredible wraps lies in using both fresh garlic and garlic powder. This two-pronged approach creates layers of garlic flavor that make these wraps irresistible. The fresh garlic provides bright, punchy notes while the powder offers a deeper, more mellow garlic undertone.
Equipment Required
You’ll need basic kitchen tools to assemble these wraps:
- Large skillet (non-stick or cast iron)
- Cutting board and sharp knife
- Measuring cups and spoons
- Mixing bowls (1 medium, 1 small)
- Garlic press (optional but helpful)
- Tongs
- Cheese grater (if you’re shredding your own cheese)
- Aluminum foil (for wrapping and keeping warm)
Step-by-Step Instructions
Preparing the Chicken
- Slice chicken breasts into thin strips, about 1/4 inch thick
- In a medium bowl, combine 2 tablespoons olive oil, 3 minced garlic cloves, 1/2 tablespoon Italian seasoning, 1/2 teaspoon salt, and 1/4 teaspoon black pepper
- Add chicken strips to the mixture, toss to coat evenly
- Let marinate for at least 15 minutes (longer if you have time)
- Heat a large skillet over medium-high heat
- Add the marinated chicken strips in a single layer (work in batches if needed)
- Cook for 3-4 minutes on each side until golden brown and cooked through (internal temperature should reach 165°F)
- Transfer cooked chicken to a plate and cover with foil to keep warm
Preparing the Vegetables
- In the same skillet, add remaining 1 tablespoon olive oil
- Add sliced red onion and cook for 2 minutes until slightly softened
- Add sliced bell pepper and remaining minced garlic, cook for 3 more minutes
- Add spinach and cook just until wilted, about 1 minute
- Season with remaining Italian seasoning, salt, and pepper
- Transfer vegetable mixture to a bowl and set aside
The key to getting the vegetables just right is to avoid overcooking them. You want them tender-crisp, not mushy. The spinach especially needs minimal cooking time—it should be just wilted enough to be manageable in the wrap.
Assembling and Cooking the Wraps
- Wipe the skillet clean and return to medium heat
- Add 1/2 tablespoon butter and let it melt
- Place one tortilla in the skillet and heat for about 30 seconds until pliable
- Sprinkle 1/4 cup of cheese directly onto the warm tortilla
- Working quickly, add 1/4 of the chicken strips in the center of the tortilla
- Top with 1/4 of the vegetable mixture
- Sprinkle another 1/4 cup of cheese on top
- Fold in the sides of the tortilla, then roll tightly from bottom to top
- Cook the assembled wrap seam-side down first, until golden brown, about 2 minutes
- Flip and cook the other side until golden and cheese is melted, about 2 more minutes
- Transfer to a cutting board
- Repeat with remaining ingredients, adding more butter to the skillet as needed
One mistake many people make is rushing through the assembly process. Take your time to arrange the ingredients properly, as this ensures even distribution of flavors in every bite. Also, don’t skip the step of putting cheese both under and over the fillings—this “cheese sandwich” approach guarantees maximum meltiness.
Final Touches
- Let each wrap rest for 2-3 minutes before cutting
- Slice each wrap diagonally in half
- Garnish with chopped fresh parsley
- Serve immediately with sour cream on the side
Practical Tips for Wrap Success
After making these wraps countless times, I’ve gathered some practical wisdom that helps guarantee success:
- Prep ahead: Slice the chicken and vegetables in advance to make assembly quicker
- Don’t overstuff: It’s tempting to pile on ingredients, but overstuffed wraps tend to break
- Watch your heat: Medium heat is ideal—too high will burn the tortilla before the cheese melts
- Use freshly shredded cheese: Pre-shredded cheese contains anti-caking agents that affect melting
- Create a “cheese dam”: Sprinkle cheese all the way to the edges of your tortilla to help seal the wrap
- Consider toothpicks: If you’re serving these at a gathering, secure them with toothpicks before cutting
Following these tips has saved me from many wrap disasters and ensures picture-perfect results every time.
Nutritional Information
For those watching their nutritional intake, here’s a breakdown of what you can expect from one Cheesy Garlic Chicken Wrap:
| Nutrient | Amount per Wrap |
|---|---|
| Calories | 490 |
| Protein | 32g |
| Carbohydrates | 39g |
| Dietary Fiber | 3g |
| Sugars | 4g |
| Fat | 25g |
| Saturated Fat | 11g |
| Cholesterol | 95mg |
| Sodium | 780mg |
| Calcium | 250mg |
| Iron | 3mg |
| Vitamin A | 2500IU |
| Vitamin C | 45mg |
These values are approximate and may vary based on specific brands and exact quantities used.
Make-Ahead and Storage Options
One of the reasons I love this recipe is its flexibility for meal prep:
| Storage Method | Recommendation | Maximum Time |
|---|---|---|
| Refrigerator (assembled, uncooked) | Wrap individually in plastic wrap | 24 hours |
| Refrigerator (cooked) | Wrap in foil, then place in airtight container | 3 days |
| Freezer (assembled, uncooked) | Wrap in plastic, then foil, place in freezer bag | 2 months |
| Freezer (cooked) | Wrap in foil, then freezer bag | 1 month |
Reheating Instructions:
- From refrigerated (cooked): Microwave for 1-2 minutes or heat in a skillet over medium heat for 2-3 minutes per side
- From frozen (cooked): Thaw overnight in refrigerator, then reheat as above
- From frozen (uncooked): Thaw overnight in refrigerator, then cook according to original instructions

Variations to Keep Things Interesting
While the classic version is hard to beat, I’ve experimented with numerous variations that are worth trying:
Mediterranean Style
- Add kalamata olives, feta cheese, and diced cucumber
- Replace Italian seasoning with oregano and lemon zest
- Serve with tzatziki instead of sour cream
Southwest Twist
- Add black beans, corn, and avocado
- Replace Italian seasoning with taco seasoning
- Add a squeeze of lime juice
- Serve with salsa and guacamole
Buffalo Chicken
- Toss cooked chicken with buffalo sauce before assembling
- Add crumbled blue cheese and celery
- Serve with ranch dressing
Vegetarian Option
- Replace chicken with sautéed portobello mushrooms
- Double the bell peppers and add zucchini
- Use smoked provolone for deeper flavor
These variations follow the same basic method but offer completely different flavor profiles to keep your meal rotation exciting.
Serving Suggestions
These wraps are substantial enough to serve as a complete meal, but if you’re looking to round out the presentation:
- Garden salad with light vinaigrette
- Quick cucumber and tomato salad
- Baked sweet potato fries
- Fresh fruit salad
- Tomato soup (for a soup and sandwich combo)
- Sparkling water with lemon or lime
- Iced tea with mint and lemon
For a casual gathering, I like to cut the wraps into pinwheels (about 1-inch thick) and serve them as appetizers alongside some of the dipping options mentioned earlier.
Time-Saving Tips for Busy Weeknights
When I’m particularly pressed for time, these shortcuts help get dinner on the table faster:
- Use rotisserie chicken instead of cooking chicken from scratch
- Buy pre-chopped vegetables from the produce section
- Keep a batch of sautéed garlic-seasoned vegetables in the freezer
- Use a panini press to cook both sides of the wrap simultaneously
- Make a large batch and freeze extras for future quick meals
Even with these shortcuts, you’ll still get exceptional flavor—that’s the beauty of this recipe’s foundation.

Frequently Asked Questions
Here are some questions I frequently receive about this recipe:
Q: Can I use corn tortillas instead of flour tortillas? While you technically can, I don’t recommend it. Corn tortillas are smaller and more prone to cracking when folded. If you need a gluten-free option, look for gluten-free flour tortillas specifically designed for wrapping.
Q: How can I make these wraps lower in calories? Use reduced-fat cheese, whole wheat tortillas, and increase the vegetable-to-chicken ratio. You can also use Greek yogurt instead of sour cream for serving.
Q: My wraps always fall apart. What am I doing wrong? The most common cause is overfilling. Start with less filling than you think you need. Also, make sure your tortilla is warm and pliable before attempting to fold it, and use the cheese as a binding agent by letting it melt slightly before folding.
Q: Can I make these in the oven instead of a skillet? Yes! Assemble the wraps, place them seam-side down on a baking sheet, brush with a little oil or butter, and bake at 375°F for about 10-12 minutes until golden and crisp.
Q: My family doesn’t like spinach. What can I substitute? You can use any leafy green like kale (finely chopped) or arugula. If greens are completely off the table, try finely shredded cabbage or just increase the amount of bell peppers.
Q: How spicy are these wraps? The basic recipe is very mild and family-friendly. The heat comes from optional additions like hot sauce, so you can easily adjust to your preference.
Q: What’s the best cheese to use if I can only choose one type? If limited to one cheese, I’d recommend a good quality medium cheddar. It melts well and has enough flavor to stand up to the garlic and chicken.
Why This Recipe Works
What makes these Cheesy Garlic Chicken Wraps so special is the careful balance of flavors and textures. The garlic infuses everything with its aromatic essence without overwhelming the other ingredients. The chicken provides satisfying protein while remaining tender and juicy. The vegetables add freshness, crunch, and nutrition. And the cheese—oh, the cheese—brings everything together with its melty, creamy goodness.
I’ve shared this recipe with countless friends and family members, and it’s now a staple in many of their homes too. It’s the perfect introduction to cooking for beginners, yet has enough nuance to satisfy experienced cooks.
What I love most about these wraps is how they bring everyone to the table with enthusiasm. In our busy household, finding a meal that pleases everyone isn’t always easy, but these wraps consistently earn rave reviews from both kids and adults.
So the next time you’re facing the eternal question “What’s for dinner?” give these Cheesy Garlic Chicken Wraps a try. I’m confident they’ll earn a spot in your regular meal rotation, just as they have in mine.

